Categories
Class Blog

Tips to Making Your Website Accessible

Accessibility is an extremely important aspect of web design. In many places, it is even the law for websites to be accessible to people with impairments of all types, such as hearing impairments, visual impairments and many more. 

In my Digital Production class, we are designing our own web project. In this, I will need to make sure everything is accessible as possible. I have created a list of things I plan on implementing into my website and I want to take the time to discuss them in detail here in case you would like to make your website accessible as well. 

Let’s begin. . . 

Design Your Site to be Keyboard-Friendly

Design your site with the keyboard in mind. Every section of your website (content, links, pages, etc.) should be accessible without the use of a mouse. Many assistive technologies rely strictly on keyboard-only navigation. You should note that [Tab] is the standard key for navigation. This jumps the cursor between areas on a page and should be implemented into your HTML. 

Keep Tables Simple

Tables can be very helpful to get your point across, but they need to be used lightly. If you plan on adding a table to your website, be sure to simplify it as much as possible and make sure it makes sense in table format. Something like a list does not work as a table because the screen reader may read the information out of order, which will confuse the user. Tables can disorient screen readers and should be used with caution. 

Avoid Using Pixels

Image showing a pixelized ‘S’ on left and a smooth ‘S’ on right. This shows the difference in bitmap and scalable vector graphics

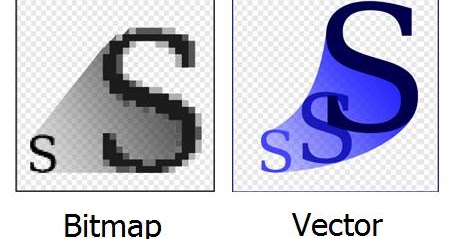
When adding text and images to your website, be sure that they are scalable. Scalability is important to allow the ability for someone with troubled sight to see your content reliably and easily. Many images are made with pixels, which begin to distort the image when blown up to a large size. Instead, try to use scalable vector graphics (SVGs) whenever and wherever possible.

Carefully Choose Colors

About 4.5 percent of the population on Earth is color blind. That is around 3 million documented color-blind people on the planet.  Be sure to use colors that complement each other and allow the reader to clearly see the text or image. Do not use clashing colors or similar colors; clashing colors can hurt the readers eyes and similar colors can be difficult to see.  
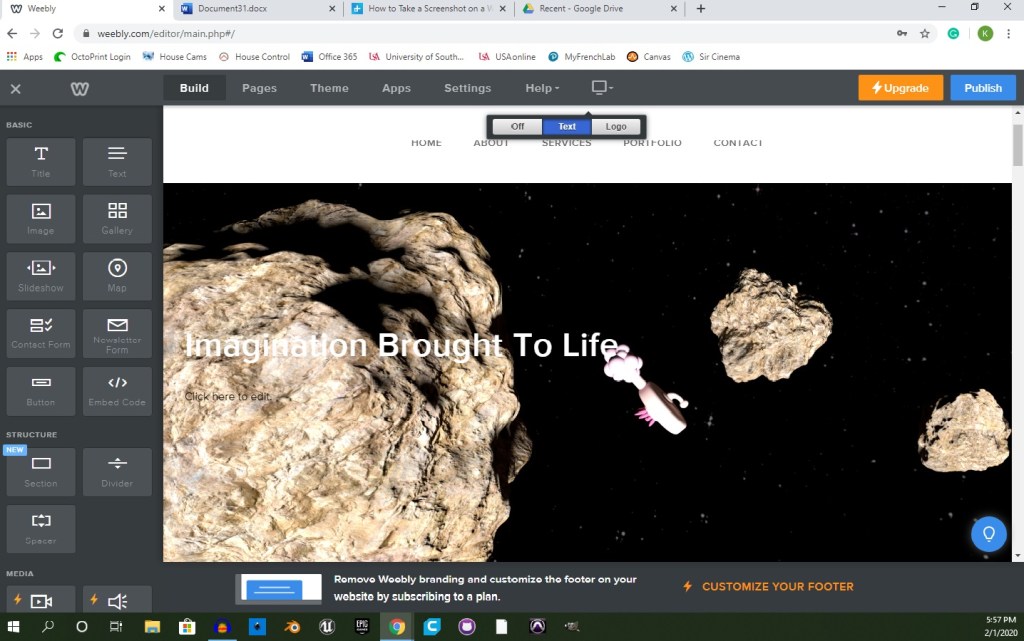
Always Add Alt Text

It is important to have alternative text that accurately describes the image. Alternative text is the text you see directly under most images on the web.

“How to Add Alt Text to Instagram Posts” The image above is a link to <socialmediaexaminer.com/how-to-add-alt-text-instagram-posts/>

This is intended to be read aloud by a screen reader to people with visual impairments. Without it, the screen reader would read the file name instead (something like 4452a9ae0627f629ae2acd6e6f7839f5) which would be very confusing to the user. 

Avoid Flashing Lights

This is something that I felt was not prominently discussed in class for this lesson, because ignoring it can result in fatality. You should always be mindful of photosensitivity. Avoid flashing lights whenever possible. If you do include something that flashes in your website, reduce contrast, avoid red, and provide a mechanism to stop the content from flashing before it starts. 

Keep Accessibility in Mind

There are some great tools out there that can make this process much simpler. Here is a list of accessibility tools to help you along the way.

Accessibility is important to every web project you work on. Everybody deserves the chance to experience any website regardless of disability or impairments. I will be sure to apply all of these tips to my own web project and I hope you do the same. See you next week!

Categories
Class Blog

5 Tips for Organizing a Website

Web design can be pretty tough to tackle, but it’s near impossible to do without structure, planning, and organization. Today, I am going to offer five helpful tips I’ve learned along my journey.

Tip 1: Plan your web design on paper first.

designer drawing website development wireframe

Create a basic outline for each of your pages and pencil out a rough structure of your site. This is important because it will help to visualize your site before you put in the effort of actually bringing the idea to fruition. Trust me when I say that erasing a pencil mark is much simpler than reworking the design on a web page!

Tip 2: Everything needs its own page.

Not EVERYTHING, but almost everything should have a separate page from the home page. Think of these as “doors” to your website. Not every user should have to take the same exact door to get in. Each individual service you offer should be a potential entryway into your site.

By having multiple landing pages, you multiply the chance of someone ending up on your website through their surf. It also reduces the amount of traffic on one particular page at a time, while maintaining the same amount of traffic overall.

Tip 3: Keep track of your content.

It is wise to keep a few lists on hand when designing your website:

For every page, you will need a link. A list of your main navigation links (e.g., Contact Us, Our Services, etc) can be a smart tool to have. It will help ensure you don’t forget any important pathways and can help keep you on track when you are tying up loose ends with your design.

What content do you plan on adding? You should make a list of content you need/want to add to your website. You can also use this to takes notes on where you want certain to go, which will make the process much less stressful.

Tip 4: Use practical categories.

According to web designer Jordan Dick, “If you were a landscaper offering different landscaping services like, ‘landscape lighting,’ ‘landscape design,’ etc., you’d want all those services under one category, on one tab of your main menu.

Chunking relevant content together in a logical way is imperative to a successful web design. The human brain already attempts to chunk information, so this can make a website very pleasing to the eye, but if you fail to do this, finding content specific to the user’s needs becomes increasingly more difficult.

main menu to Australian Framing Solutions’ website, showing one drop-down category being highlighted.

Making sure your content is properly categorized can help with the user’s ability to recall the area of interest within your website for back-tracking or future use.

Tip 5: Keep the main menu concise.

While the main menu of a website can be creative, there needs to be a direct reference in what the site’s primary purpose is.

A user shouldn’t be looking at your main menu and also thinking, “I wonder what this is all about?” Make sure it is obvious at a glance what the user is in for.

By staying organized and keeping track of your content, the road to a well-designed website instantly becomes a lot less bumpy. For more about information organization in web design, click HERE! (don’t worry, it’s not an ad).

Categories
Class Blog

Weeblog: What’s Up With Weebly?

Think about this: You are an aspiring voice actor. You have done some small roles, you put together a demo reel and you are ready to chase bigger jobs.

“How can I show that I am serious about pursuing a career in voice acting?” you ask. The answer? Create a website!

Creating a website used to be difficult to do unless you were well-read in coding and script-writing, but, thanks to programs like Weebly, that is no longer the case.

In my Digital Writing and Production class, we set up Weebly accounts. The goal of this is to design our own portfolios. The process was relatively simple and, since I have (absolutely) no experience with web design, I was very happy to find that the platform is very easy to use. Let me explain my experience.

White ‘W’ in blue square. Weebly.com Logo

What is Weebly?

Weebly is a tool designed to act as an interface on which you can make your very own website. It allows even the least experienced people design any kind of website they want.

Why use Weebly?

Weebly is easy to use, and you don’t have to break the bank to get something worth showing off. In fact, you can make a fully immersive website for free! It also has loads of features that make a web designer’s life much easier.

Some features include:

  • Drag and drop website building makes the process as simple as picking a theme and dragging things where you want them to go.
  • Responsive templates which are easy to edit and include pre-written, easy to change CSS and HTML.
  • Device Switcher which allows you to simulate what your site will look like on different devices.

Also, lead designer at Weebly Wendy Ho had this little trick (mentioned in 5 Website Design Tips from a Weebly Expert) to help even more:

“You can move, copy or delete a lot of things at once: Click the column that divides elements, then click the arrow on the left to copy or the ‘x’ on the right to delete the entire group.”

While Weebly is, overall, simple to use, it can be a useful tool for people learning web design. It still requires some knowledge of HTML and CSS to take full advantage of the customization available, which makes Weebly great to use (as my class is) as a tool to learn how to write custom code.

My Weebly Site

I am in the very early stages of creation.

Screenshot of webpage editor. Image of space, with three asteroids and a regular plumbus. Title reads: “Imagination Brought To Life”

When creating my website on Weebly, I decided to use Typo Designs – Cento 2 as my theme. It is a dark theme, using mostly black with red highlights and white text. I chose this theme because it was the first to pop out at me. I typically do things with a sense of spontaneity, but I also liked the sense of serious confidence that it portrayed. While I do enjoy the theme, overall, I will probably change the layout of the site to better suit my art portfolio.

Design a site like this with WordPress.com
Get started